Pages

.

.
Showing posts with label #digitalstamping. Show all posts

Friday, 27 March 2020

Big Bunch of flowers!

Hello all,
Well, this week I am going to show you a card using the most fabulous image called Winnie Celebrations - Big Bunch from our wonderful sponsor 
POLKADOODLES
Winnie Celebrations 1... Big Bunch digi stamp printable download
Isn't she pretty?
This week, it is Team D's turn at Colour Crazy Challenge to inspire you.  If you haven't used Polkadoodles images before, well, really where have you been? Lol
Nikky Hall has an awesome array of fabulous goodies including dies, stencils, paper pads, digital download kits and images, digital downloadable papers and sentiments and so much more.  You really should go and have a look around the store, you are sure to find something that you love.

Remember folks, this is a colouring challenge.  We must see some hand colouring on your project.  We do not accept digital colouring/projects.

So, here is the card I made this time.

Now I was going to go with the same colour scheme as the image package but in the end I decided to go with an orange colour scheme instead.

The papers are from a Lili of the Valley paper pad which they sadly don't make anymore.  Such a shame because they were very reasonably priced and such fabulous quality.  Aah well.

The image is coloured with my Copics and the sentiment is one of Lisa Horton Crafts new Ticker Tape sentiment stamps.  Lisa has recently launched her own range after being with Creative Expressions for several years and I can tell you she has certainly hit the ground running.  If you are looking for good quality dies, stamps, papers, glitters and embellishments then why not just pop over to That Craft Place and have a quick look round.

Better still, why not tune in to Create and Craft on April 3rd as Lisa has THE most beautiful new release coming and you really will LOVE it.

So, please join in with our new challenge at Colour Crazy and above all, have fun.

TTFN
xxx

Challenges:

Saturday, 21 March 2020

Little Daisy - Perfect for Spring.

Hello everyone.
I hope you are all managing to stay safe and well throughout this unprecedented crisis?
It still amazes me how selfish people can be with all this panic buying doesn't it you?
Surely if we were all just a little bit sensible and only bought what we normally bought then there would be enough for everyone?  I just find it so incredibly sad.

Anyway, I digress.  Enough about this Virus thing, let's get to the important stuff of the day eh?
On to what we are all really here for - crafting!
So we are now well into our March challenge over at Ching Chou Kuik's Facebook challenge and this month's challenge for all you lovely people is Easter/Floral but some weeks the Design Team are challenged with something a little extra and this week we were to use lots of layers.
So here is my card for this week using Little Daisy.
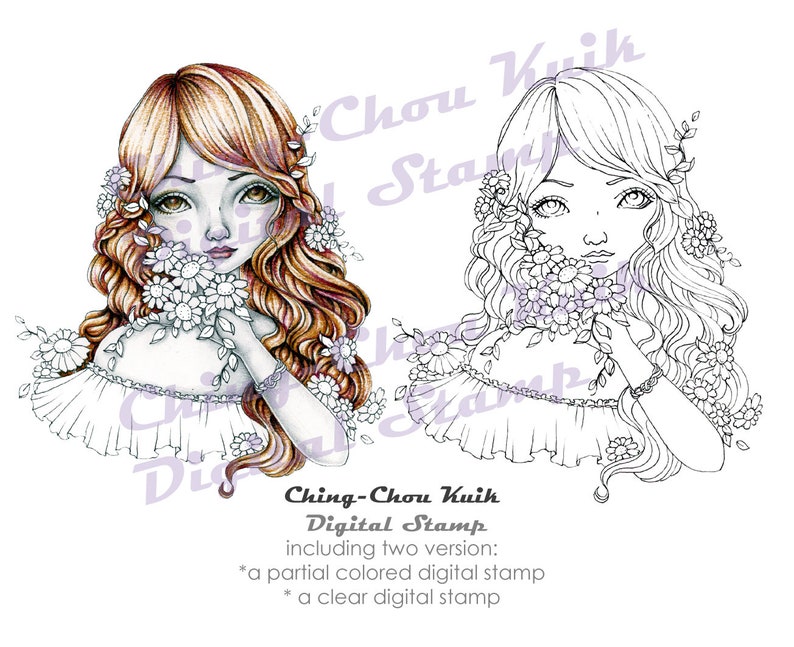
Little Daisy  PRINTABLE Instant Download Digital Stamp / image 0
The image is coloured with my copics and I decided for this image not to do any background colouring as I wanted the image to be the main focus.
The papers I have used here are from a Lili of the Valley paper pad, sadly no longer in production.

The nested flags are by Lisa Horton Crafts as are the three little flower blooms.  They are each part of new die sets recently released by Lisa on Create and Craft and I have to say they are two of my most favourite die sets ever.  The pearls in the middle of the flowers are so beautiful as they have the most fabulous shimmer on them, again one of Lisa's new releases.

I have also used a little bit of cream Sisal, also a Lisa Horton Crafts new release as is the Ticker Tape "Happy Birthday" sentiment.  They are such clean looking sentiment stamps don't you think?

Why not pop over to That Craft Place and have a look at all of Lisa's new products, there are some stunners I can tell you.

So there you go folks.  Hope you can find the time to take part in this month's challenge.  I will be back at some point during next week to show you my last inspiration card for this month's challenge.

TTFN
xxx

Challenges:
(I chose Spring - I love this time of year as it is a new beginning for so many things and gives a burst of colour after the dreary winter hues)

Saturday, 7 March 2020

Hello Spring!

Well,I might be saying Hello Spring but ir really still feels like the middle of winter here.
I hope it starts to warm up soon, I don't like the cold.  Mind you, I would rather have it cold than wet wouldn't you?  I feel so sorry for all those folk whose homes have been flooded, it must be a nightmare.
Anyway, I digress.  We are well into our new challenge at Ching Chou's Facebook Group (remember that the challenge blog also has the same theme so you could enter in both places if you wanted to!)
The theme this month is Easter or Floral, your choice.

So Hello Spring is the image I have chosen to use this week.

The main image is coloured with my Copics and the background is done with Pan Pastels and a paintbrush as I think it applys to the card much better that way.

The lace is some that I won from a wonderful lady on Facebook, Brenda's Lace and Ribbon Specials.  Sadly I don't think the group is still running anymore and that's a real shame as she had some fabulous products.

The sentiment across the lace is from Polkadoodles.

Those gorgeous bright pearls are from Lisa Horton Crafts and you can purchase them from Lisa's shop That Craft Place.  These pearls come in two sizes, 4mm and 6mm (these are the 6mm) and they have a gorgeous Mother of Pearl like shimmer to them.  They are absolutely divine.

The background paper is from a Lili of the Valley Paper Pad sadly no longer in production but such fantastic quality.  I have quite a bit to keep me going but it makes me sad to think that when they are gone, they are gone! Boooo.

So there you have it folks.  My Easter card ('cos it has a bunny on it, lol) for this week.
Hope you like it.

See you soon.
xxx
Challenges:
(I think this is a perfect image for a female card and of course the image is female too)


Saturday, 22 February 2020

Love - Must be something in the air!

Hi all
February is all about love isn't it?
Well, just because it is about love doesn't mean it has to be pink or red right?

This is the card I made for week 3 of our challenge over at Ching Chou Kuik's Facebook challenge.  (The blog challenge has the same theme so you could enter there too! 😉😉)

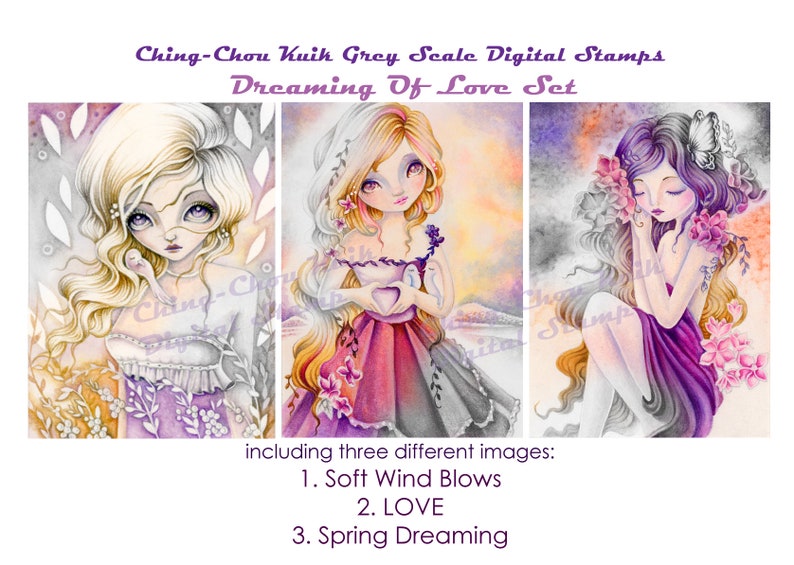
My card features the gorgeous LOVE image which is part of the Dreaming of Love set at Ching Chou's Etsy store.  What a gorgeous set of images this is.
Dreaming Of Love Set  Greyscale PRINTABLE Instant Download image 0


I coloured this with my Copics and then went over some of it with my Polychromo pencils.  I am really really pleased with how this came out.
I think it looks lovely and soft in those lemon colours don't you?
Would you use an alternative to pink/red on your Valentine's cards?

The papers are from a Lili of the Valley with Raspberry Road Designs paper pad called Heartfelt.  I decided to use two different papers and cut them on the diagonal, something a bit different.  Does it work?  
The flowers are from my stash and the sentiment and little heart are from the Polkadoodles stamp set from the new Timeless Rose collection.

The background is done with my Pan Pastels and I "painted" them on with a paint brush.
So there you go.  Hope you can find a bit of spare time to join in with our challenge this month, we always love to see your fabulous creations.

See you soon.
XXX

Challenges:

Tuesday, 4 February 2020

Love Hearts with Oddella.

A very good morning to you all.
Do Valentine Cards always have to be in red or pink?
I don't think so, and that is the thinking behind my latest card.

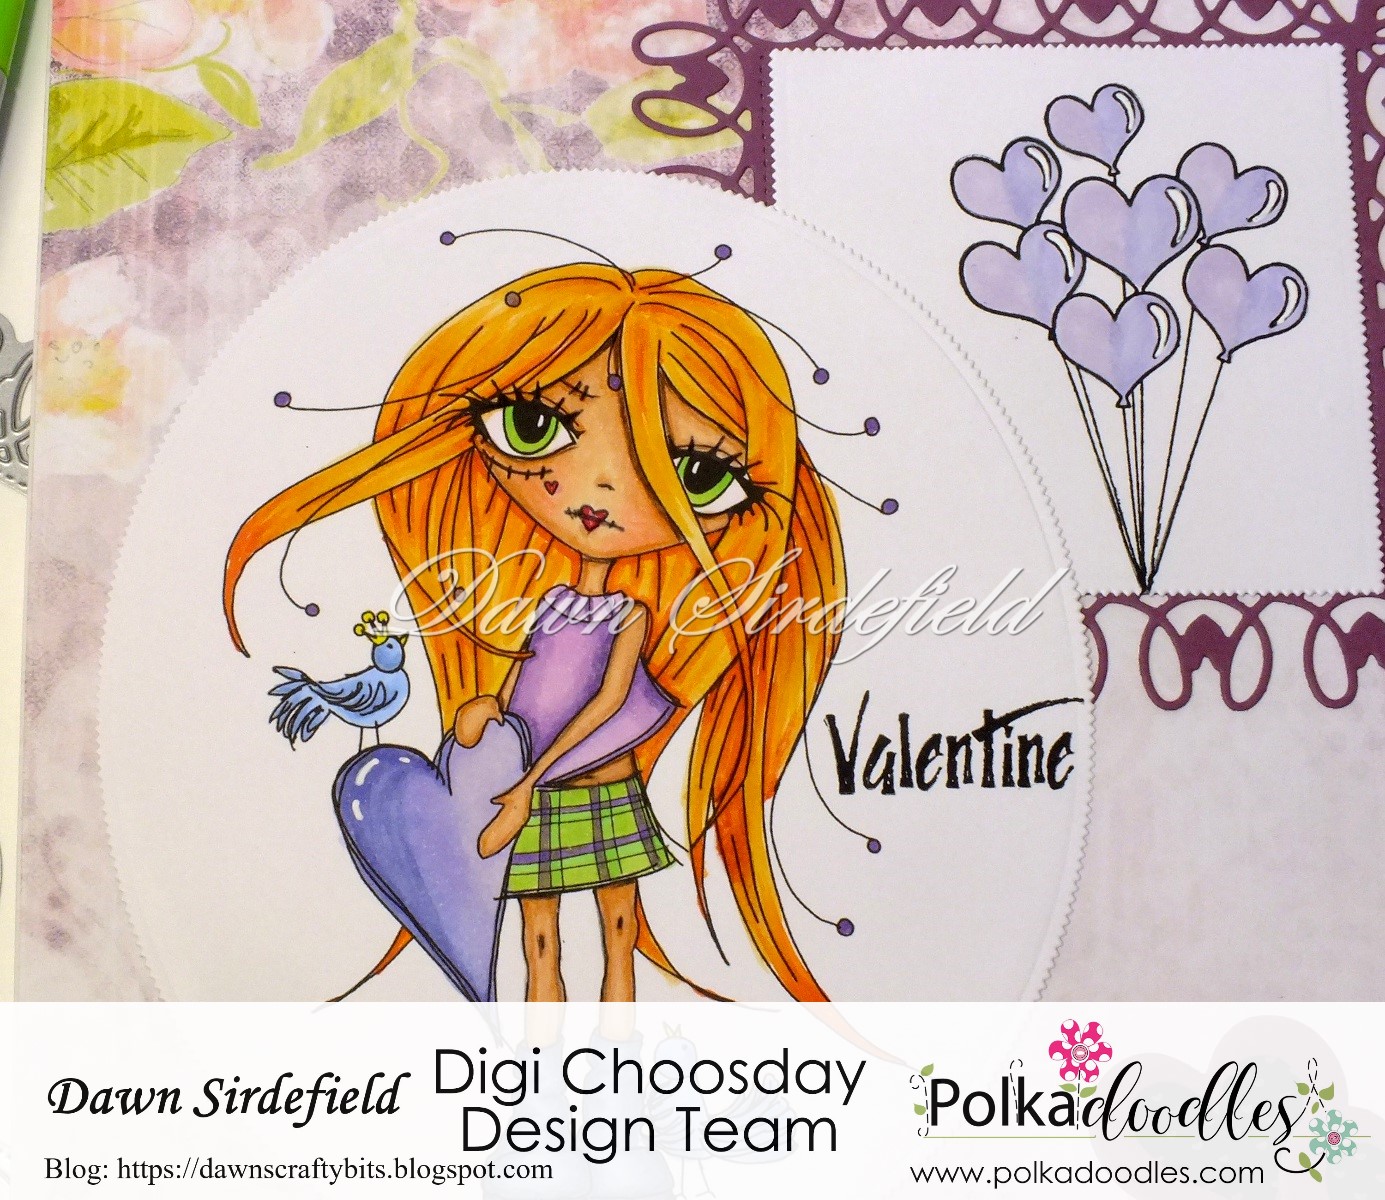
This card features the gorgeous Oddella available here
As soon as I saw this image I just knew she was going to be on my Valentine Card.

Now because she is a bit, "out of the ordinary" shall we say, I thought that the colours I used should be non ordinary too.

You may or may not know that I love purple so that was the colour I went with.  I added a bit of bright green on her skirt to make it a non traditional plaid.

Now obviously she had to have hair that was "different" too so I went with a fabulous Red Head look for her.

The Design Team were challenged to add heart shaped balloons on our projects this week and I knew just how I was going to do that.
Have you seen the Timeless Rose collection which was released recently?  Well if you haven't just click on the link and go have a look - it is a gorgeous collection.  You don't have to buy the whole collection, it all comes as seperate components too, but to be honest when I looked, it just made sense to buy it all! Lol

So in the stamp collection is this perfect stamp of heart shaped balloons! Just what I needed.
I used the die to make a frame and then added a white square on top to stamp the balloons on.  The Heart shapes at the bottom are also part of the die set and I stamped a small heart from the stamp collection on top of them.

The backing papers are from the Winnie Wonderland Paper Heaven 6 download and I love them all.
All in all, I am pretty happy with how this came out.  I think I am getting a bit more adventurous with my layouts these days and that is thanks, in part, to being a part of this fabulous Digi Choosday Design Team.
Are you adventurous with how you put your cards together?  Do you prefer Clean and Simple or The more the Merrier?  Why not leave me a comment and let me know?

So, there you go, that's it from me for today.
See you soon.
xxxx
Challenges:

Friday, 31 January 2020

Darling Bud Marigold

Hi everyone
Welcome to another Team D challenge at Colour Crazy.
Sorry I am a bit late posting - been out all day and forgot to schedule! Duh!!

You know when you see an image and think, "I love that, I just have to have it"?
Well, that was the case with this gorgeous Darling Bud Marigold from Polkadoodles.
It is one of a set of Darling Buds images, all of which are gorgeous, but this one just stood out for some reason and I just had to use it for this challenge.
The fabulous POLKADOODLES is our sponsor for this fortnight and we got to choose which image we wanted to use, this was the one I chose.


So, having chosen my image, I printed her out and put her on my desk!!
WHAM!!!!
Where on earth do I start?
I just sat there for a while, staring at the image and thinking "what on earth have I done?"

Well, after a mild panic, I thought back to one of the fabulous classes that Alyce Keegan does over on Facebook in her group "Kit and Clowder"
Now if you haven't seen this group - 1. Where on earth have you been hiding? (lol) and 2.  You really should go and have a look.
My colouring used to be - shall we say - Basic!! (and that is an understatement, believe me!!)
Then, I found Kit and Clowder and my colouring really started to change.
Now, I am not saying it is beyond reproach, good heavens no.  There is always room for improvement, but - and here's the thing - I am learning to colour using techniques such as lightsource and shading/blending.  Trust me, you really should go and have a look.
Anyway, I digress.  Thinking back to a previous class, where there was a lot of fine detail, Alyce's suggestion was to not be too specific.
By that I mean, treat the image as a bigger picture rather than individual petals, such as here on this image.
So, I used five different colours and literally, dotted the colour where I thought it should go.
Now, I don't know about you, but I think nature is pretty random and following that rule of thumb, I am really happy with how this turned out.
I just love the colours of Autumn - so rich and elegant and always give such a brilliant display at an otherwise dull time of the year, don't you agree?
I decided that after all that work on the image, I wanted it to be the centre of attention so I added it to a stepper card as the main focus.
The papers I have used are from a Claritystamp paper pad called Rainbow River.  This is a double sided paper pack of the very highest quality.  Maybe not the cheapest paper pack around but undoubtedly one of the very best you will find.

The sentiments are both from Polkadoodles - I used Winnie Celebrations Sentiments Kit 3 and Winnie Special Moments Quotes.
These sentiment download kits are so bloomin' useful, there are sooooo many sentiments and quotes to fit just about every occasion.  If you just type "sentiments" in the search box, it will bring up loads and loads of downloadable as well as physical sentiments of every type.

I used the same paper pad to add little accents to the card.
Here's a little close up of the image to show you what I mean about the colouring.
Be kind now!! 🙏🙏

So, there you go then.  What do you think?
I just love these colours together and they are the first colours I think of when I think of Marigolds, although I know they come in other colours too.
The other thing I did different on this image was her eyes!
I always seem to go for blue or green eyes but just thought brown would be more suitable on this image.  Do you have a "go to" eye colour or do you vary them?
Let me know in the comments, I would be interested to see who says what.
So, that's it for now.
TTFN
***

Challenges:


Saturday, 18 January 2020

Black Haired Lady - Ching Chou Kuik

Hello my lovelies.
Hope you are all keeping well?
Can't believe we are just over half way through January already, can you?
Time goes so fast these days, I sometimes wonder how we all manage to fit everything in? Lol

So, today I am here to show you my latest Ching Chou Kuik creation.

This image is called Black Haired Lady and you can find her here.
Obviously, as she is called Black Haired Lady, I just had to do her hair black. 
The background papers are from a paper pad by Claritystamp.  Really good quality and double sided too.  Those pieces across the middle of the card are the reverse side of the main background paper.  Cool eh? 
Now, I wonder if any of you can spot a difference between this card and my usual makes??
Look hard now!!

No? Well, go on then, I'll tell you.
I decided to use watercolour pencils on this card for a change.  I have two huge sets of watercolour pencils that just never see the light of day so I thought it was about time they did.

I did the skin and hair first and because they didn't turn out too bad I decided to finish her off in watercolours too.

The challenge this month is New Year or Something New (new baby, new job etc).  The DT were given a challenge to use their least favourite colour.  Well, other than pink (which really scares me) I don't seem to use a lot of green so I guess that must be a least favourite colour then eh?

Having said I don't like using green, I actually quite like how this turned out.  I even did the background with watercolour pencils too.  
I have invested in some fine paintbrushes too, as I used water brushes for this project.  I think a paintbrush and water will give more control over the colour somehow.  Well that's my theory anyway and I shall let you know how I go on.

What is your favourite medium?  Pencils, markers, watercolours, pastels, oils, distress inks???  I'd love to know.

I will be back soon with another CCK inspiration post, so see you then.
TTFN
***

Challenges:

Tuesday, 29 October 2019

A purplicious birthday card.

Hi everyone.
Here I am again to show you my latest creation.  This is a birthday card I made for a lovely young lady.
It is Choosday again folks and you know what that means don't you?  You're right, a new challenge at Digi Choosday and a fabulously wonderful huge discount off selected digital items from the Polkadoodles store.  So why not hop over to the challenge blog and grab your code and do a wee bit of shopping.  
But, wait, hang on a minute.  Just let me tell you about my card first.
I thought I would try and show you all how versatile the world of digital stamping really is.
My card is 100% digital this time.  Yep that's right, this card is totally flat although there are elements that make it appear not to be.
Let's take a look at exactly what I did to achieve this final result shall we?
I have a digital image programme called Craft Artist and that is where I do all my manipulation of the digital images.
So, firstly I downloaded the images I wanted to use on my card.  There are three paper pieces, five digital images and two digital sentiments.  I will give you all the product details in a minute or two, just in case you want to go an spend that fabulous discount code. 😉😉

Let me show you a closer view of the finished item and you should then be able to see all the individual items.
First off I added one of the sheets of paper at the back as the base.  Then I put the other two pieces onto a black background (like matting and layering).  The programme lets you put the pieces in any order so you can move things from front to back and vice versa.
Then, on top of the lightest piece of paper I added an image of a candle.  Now this is from a Christmas set so was red with holly on.  I changed the colour in my digital programme to fit in with the rest of the card and I hid the holly by putting presents in front of the candle.  Again, the presents are from a Christmas set so the colours were all wrong for my theme so I changed them to purple.  This is great as it changes the whole image into shades of purple rather than a block of colour.
Then I added my image - the gorgeous Winnie, May Your Wishes Come True.  The only thing I did with the image was to add a shadow to it to make it look 3D and I placed her so that she looks like she is standing on the frame rather than floating in mid air.  So this is how she comes if you buy the pre-coloured image.  I wanted her to stand out against all the purple so left her in her original colours, which are of course, gorgeous.
Then I added a flower from the Horace and Boo Floral collection.  I added the image twice, grouped the two images together, (this means that you can manipulate them both at the same time in exactly the same way, making them the same size etc) and then made them look 3d decoupaged using my programme.  Again I changed the colour to match my colour scheme.  Then I copied that image twice to give me three flowers, grouped them all together and placed them in the top corner.
Then I added two sentiments.  Again I added them to white and black backgrounds to make it look as though they were matted and layered.
Printed it off and stuck it to my card base and there you go! Simples!!
So here is what I used. I have indicated which things have been edited in my digital programme just so you know.

So, if you haven't ever thought of digital stamping, why not give it a go?
Then you could come back and leave me a message with a link so I can see what you did.
Can't wait to see all your fabulous entries in our latest challenge.  You always make choosing a Top 3 really difficult. Lol
Have fun.
TTFN
Challenges: